Manage several locations
Run all your coffee shops from one account and switch between them in a click.
阅读时间:3 min更新于 2026年11月11日
这篇指南还没有你的语言版本,因此以英文显示。
If you run more than one coffee shop, manage them all from the same account. Each location has its own listing and its own team.
Before you start
- You need at least one location in the portal already.
- Each location is claimed or added separately, and each one is verified separately.
What you'll get: all your locations under My locations, with a switcher to jump between them.
Steps
1. Add another location
In the portal header, tap My locations.
Tap Add another location.
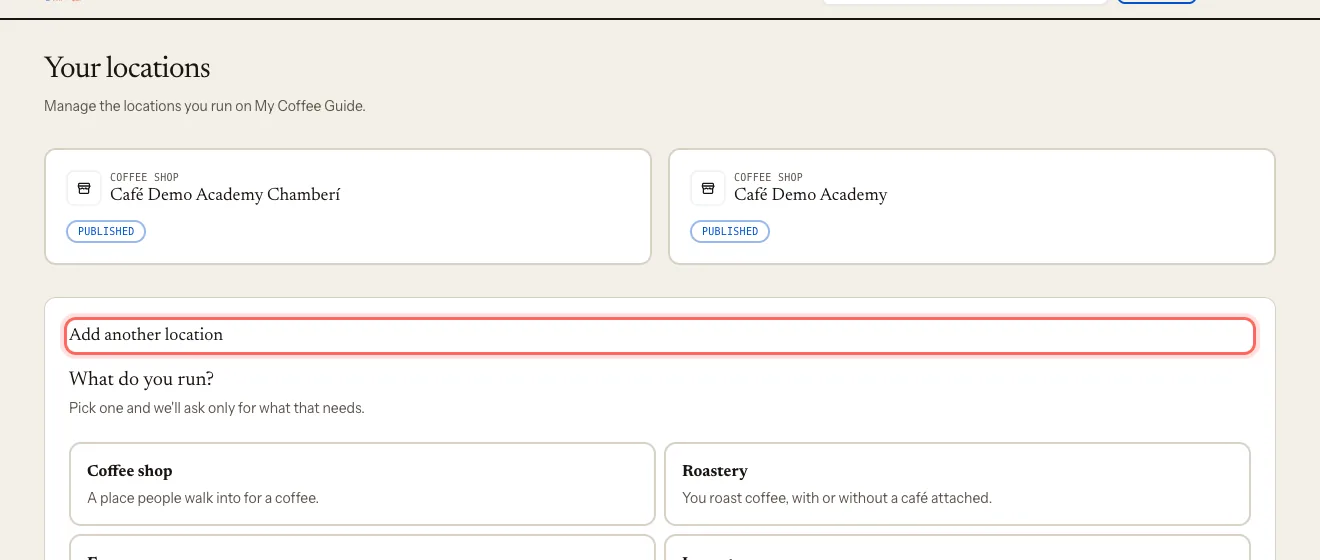
Choose what it is under What do you run? and follow the usual steps: Claim your coffee shop if it's already in the guide, or Add a new coffee shop if it isn't.
2. Switch between locations
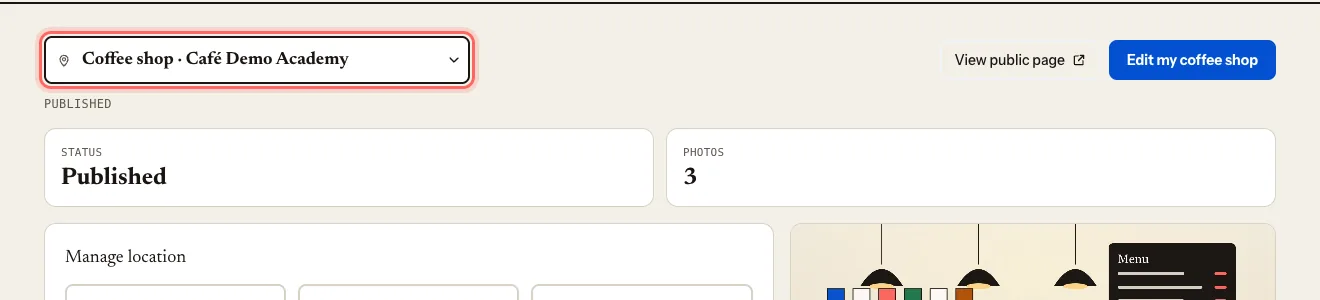
- Use the Choose a location switcher at the top of the dashboard. Each name shows its type (Coffee shop, Roastery…), in case two listings share a name.
- Or go back to My locations and tap the one you want.
My locations shows the status of each one : Published, Under review or Verification pending.
What happens next
Everything you do on the dashboard (editing the listing, posting jobs and events) applies to the location you have selected. Check the name at the top before you publish anything.
Troubleshooting
Does my team see every location? No. Each person has a role at each location. If you want someone to run two locations, invite them to both: Invite your team and choose roles.
When I sign in I go straight to one location. With a single location, the portal takes you straight to its dashboard. To see the list, tap My locations in the header.
这篇指南有帮助吗?
下一步
Invite your team and choose rolesGive your manager, your business partner or your agency access to the portal, with the permissions each one needs.相关指南
- Claim your coffee shopProve you run your coffee shop and start editing its listing on My Coffee Guide.
- Add a new coffee shop or suggest oneIf your coffee shop isn't in the guide yet, add it from the portal. If it isn't yours, suggest it from the website.
- Edit your listing: photos, hours and featuresUpdate your coffee shop's description, photos, opening hours, contact details and features.